构建你的第一个 Flow
使用 Flows 掌控 AI 工作流
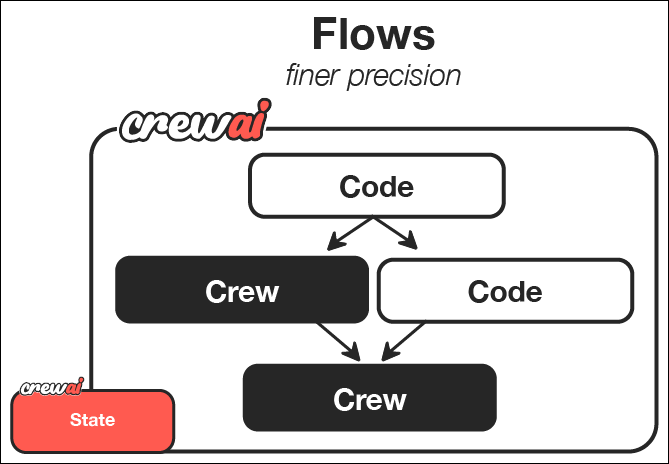
Section titled “使用 Flows 掌控 AI 工作流”CrewAI Flows 代表了 AI 编排的更高一级 - 它将 AI agent crews 的协作能力与过程式编程的精确性和灵活性结合起来。Crews 擅长 agent 协作,而 flows 则让你能够细粒度地控制 AI 系统中不同组件何时以及如何交互。
在本指南中,我们将一步步创建一个强大的 CrewAI Flow,用于生成任意主题的完整学习指南。这个教程会展示 Flows 如何通过把常规代码、直接 LLM 调用和基于 crew 的处理结合起来,为你的 AI 工作流提供结构化、事件驱动的控制。
Flows 为什么强大
Section titled “Flows 为什么强大”Flows 让你能够:
- 结合不同的 AI 交互模式 - 用 crews 处理复杂协作任务,用直接 LLM 调用处理更简单的操作,用常规代码处理过程式逻辑
- 构建事件驱动系统 - 定义组件如何响应特定事件和数据变化
- 在组件之间维护状态 - 在应用的不同部分之间共享和转换数据
- 与外部系统集成 - 无缝连接数据库、API 和用户界面
- 创建复杂执行路径 - 设计条件分支、并行处理和动态工作流
你将构建和学到什么
Section titled “你将构建和学到什么”在本指南结束时,你将:
- 创建一个复杂的内容生成系统,结合用户输入、AI 规划和多 agent 内容创作
- 编排信息在系统各组件之间的流动
- 实现事件驱动架构,让每一步都响应前一步的完成
- 建立可扩展的基础,便于你继续构建更复杂的 AI 应用
这个 guide creator flow 展示了可用于构建更高级应用的基础模式,例如:
- 结合多个专门化子系统的交互式 AI 助手
- 带有 AI 增强转换的复杂数据处理流水线
- 与外部服务和 API 集成的自主 agent
- 带有人类在环流程的多阶段决策系统
让我们开始构建你的第一个 flow。
开始之前,请确保你已经:
第 1 步:创建一个新的 CrewAI Flow 项目
Section titled “第 1 步:创建一个新的 CrewAI Flow 项目”首先,让我们使用 CLI 创建一个新的 CrewAI Flow 项目。这个命令会搭建好项目脚手架,并为你的 flow 提供所有必要的目录和模板文件。
crewai create flow guide_creator_flowcd guide_creator_flow这会生成一个具有基本结构的项目,满足你的 flow 所需。
第 2 步:理解项目结构
Section titled “第 2 步:理解项目结构”生成的项目具有如下结构。起始嵌入式 crew 使用经典的 Python/YAML 布局,而在第 4 步我们会把内容 crew 替换为 JSONC crew。
guide_creator_flow/├── .gitignore├── pyproject.toml├── README.md├── .env└── src/ └── guide_creator_flow/ ├── __init__.py ├── main.py ├── crews/ │ └── poem_crew/ │ ├── config/ │ │ ├── agents.yaml │ │ └── tasks.yaml │ └── poem_crew.py └── tools/ └── custom_tool.py这个结构把 flow 的不同组件清晰地分离开来:
src/guide_creator_flow/main.py中是主要的 flow 逻辑src/guide_creator_flow/crews目录中是专门化 crewssrc/guide_creator_flow/tools目录中是自定义工具
我们会修改这个结构,创建一个 guide creator flow,用于编排生成完整学习指南的过程。
第 3 步:添加一个内容写作 crew
Section titled “第 3 步:添加一个内容写作 crew”我们的 flow 需要一个专门的 crew 来处理内容创作过程。让我们使用 CrewAI CLI 添加一个内容写作 crew:
crewai flow add-crew content-crew这个命令会自动创建所需的目录和模板文件。内容写作 crew 会负责编写和审阅指南的各个章节,并在主应用编排的整体 flow 中协作。
第 4 步:配置内容写作 crew
Section titled “第 4 步:配置内容写作 crew”现在,让我们使用 JSONC 配置内容写作 crew。我们会设置两个专门化 agent - 一个写作者和一个审阅者 - 让它们协作,为我们的指南创建高质量内容。
- 创建
src/guide_creator_flow/crews/content_crew/agents/content_writer.jsonc:
{ "role": "Educational Content Writer", "goal": "Create engaging, informative content that thoroughly explains the assigned topic and provides valuable insights to the reader.", "backstory": "You are a talented educational writer who explains complex concepts in accessible language and organizes information clearly.", "llm": "provider/model-id", "settings": { "verbose": true }}- 创建
src/guide_creator_flow/crews/content_crew/agents/content_reviewer.jsonc:
{ "role": "Educational Content Reviewer and Editor", "goal": "Ensure content is accurate, comprehensive, well-structured, and consistent with previously written sections.", "backstory": "You are a meticulous editor with an eye for detail, clarity, and coherence.", "llm": "provider/model-id", "settings": { "verbose": true }}把 provider/model-id 替换为你使用的模型,例如 openai/gpt-4o、gemini/gemini-2.0-flash-001 或 anthropic/claude-sonnet-4-6。
- 创建
src/guide_creator_flow/crews/content_crew/crew.jsonc:
{ "name": "Content Crew", "agents": ["content_writer", "content_reviewer"], "tasks": [ { "name": "write_section_task", "description": "Write a comprehensive section on the topic: \"{section_title}\".\n\nSection description: {section_description}\nTarget audience: {audience_level} level learners\n\nYour content should begin with a brief introduction, explain key concepts clearly with examples, include practical applications where appropriate, end with a summary, and be approximately 500-800 words.\n\nPreviously written sections:\n{previous_sections}", "expected_output": "A well-structured, comprehensive section in Markdown format that thoroughly explains the topic and is appropriate for the target audience.", "agent": "content_writer", "markdown": true }, { "name": "review_section_task", "description": "Review and improve this section on \"{section_title}\":\n\n{draft_content}\n\nTarget audience: {audience_level} level learners\nPreviously written sections:\n{previous_sections}\n\nFix errors, improve clarity, verify consistency, enhance structure, and add missing key information.", "expected_output": "An improved, polished version of the section that maintains the original structure but enhances clarity, accuracy, and consistency.", "agent": "content_reviewer", "context": ["write_section_task"], "markdown": true } ], "process": "sequential", "verbose": true}context 字段让审阅者可以使用写作者的输出。
- 把
src/guide_creator_flow/crews/content_crew/content_crew.py替换为一个小型加载器:
from pathlib import Path
from crewai.project import load_crew

def kickoff_content_crew(inputs: dict):    crew, default_inputs = load_crew(Path(__file__).with_name("crew.jsonc"))    return crew.kickoff(inputs={**default_inputs, **inputs})
这个加载器会在运行时把 crew.jsonc 转换为 Crew。虽然这个 crew 可以独立运行,但在我们的 flow 里,它会被编排进更大的系统中。
第 5 步:创建 Flow
Section titled “第 5 步:创建 Flow”现在到了最令人兴奋的部分 - 创建一个会编排整个指南生成过程的 flow。在这里,我们会把常规 Python 代码、直接 LLM 调用,以及内容创作 crew 组合成一个统一系统。
我们的 flow 会:
- 获取用户对主题和受众级别的输入
- 直接调用 LLM 创建结构化的指南大纲
- 按顺序使用内容写作 crew 处理每个章节
- 把所有内容合并成最终的完整文档
让我们在 main.py 文件中创建 flow:
#!/usr/bin/env pythonimport jsonimport osfrom typing import List, Dictfrom pydantic import BaseModel, Fieldfrom crewai import LLMfrom crewai.flow.flow import Flow, listen, startfrom guide_creator_flow.crews.content_crew.content_crew import kickoff_content_crew
# 定义结构化数据模型class Section(BaseModel):    title: str = Field(description="章节标题")    description: str = Field(description="该章节应涵盖内容的简要说明")
class GuideOutline(BaseModel):    title: str = Field(description="指南标题")    introduction: str = Field(description="主题介绍")    target_audience: str = Field(description="目标受众说明")    sections: List[Section] = Field(description="指南章节列表")    conclusion: str = Field(description="指南结论或总结")
# 定义 flow 状态class GuideCreatorState(BaseModel):    topic: str = ""    audience_level: str = ""    guide_outline: GuideOutline = None    sections_content: Dict[str, str] = {}
class GuideCreatorFlow(Flow[GuideCreatorState]):    """用于创建任意主题综合指南的 Flow"""
    @start()    def get_user_input(self):        """获取用户关于指南主题和受众的信息"""        print("\n=== Create Your Comprehensive Guide ===\n")
        # 获取用户输入        self.state.topic = input("What topic would you like to create a guide for? ")
        # 带校验地获取受众级别        while True:            audience = input("Who is your target audience? (beginner/intermediate/advanced) ").lower()            if audience in ["beginner", "intermediate", "advanced"]:                self.state.audience_level = audience                break            print("Please enter 'beginner', 'intermediate', or 'advanced'")
        print(f"\nCreating a guide on {self.state.topic} for {self.state.audience_level} audience...\n")        return self.state
    @listen(get_user_input)    def create_guide_outline(self, state):        """使用直接 LLM 调用创建结构化指南大纲"""        print("Creating guide outline...")
        # 初始化 LLM        llm = LLM(model="openai/gpt-4o-mini", response_format=GuideOutline)
        # 构建用于生成大纲的消息        messages = [            {"role": "system", "content": "You are a helpful assistant designed to output JSON."},            {"role": "user", "content": f"""            Create a detailed outline for a comprehensive guide on "{state.topic}" for {state.audience_level} level learners.
            The outline should include:            1. A compelling title for the guide            2. An introduction to the topic            3. 4-6 main sections that cover the most important aspects of the topic            4. A conclusion or summary
            For each section, provide a clear title and a brief description of what it should cover.            """}        ]
        # 使用 JSON 响应格式进行 LLM 调用        response = llm.call(messages=messages)
        # 解析 JSON 响应        outline_dict = json.loads(response)        self.state.guide_outline = GuideOutline(**outline_dict)
        # 保存前确保输出目录存在        os.makedirs("output", exist_ok=True)
        # 将大纲保存到文件        with open("output/guide_outline.json", "w") as f:            json.dump(outline_dict, f, indent=2)
        print(f"Guide outline created with {len(self.state.guide_outline.sections)} sections")        return self.state.guide_outline
    @listen(create_guide_outline)    def write_and_compile_guide(self, outline):        """编写所有章节并汇总成指南"""        print("Writing guide sections and compiling...")        completed_sections = []
        # 一次处理一个章节,以保持上下文流动        for section in outline.sections:            print(f"Processing section: {section.title}")
            # 基于前文构建上下文            previous_sections_text = ""            if completed_sections:                previous_sections_text = "# Previously Written Sections\n\n"                for title in completed_sections:                    previous_sections_text += f"## {title}\n\n"                    previous_sections_text += self.state.sections_content.get(title, "") + "\n\n"            else:                previous_sections_text = "No previous sections written yet."
            # 针对该章节运行 content crew            result = kickoff_content_crew(inputs={                "section_title": section.title,                "section_description": section.description,                "audience_level": self.state.audience_level,                "previous_sections": previous_sections_text,                "draft_content": ""            })
            # 存储内容            self.state.sections_content[section.title] = result.raw            completed_sections.append(section.title)            print(f"Section completed: {section.title}")
        # 汇总最终指南        guide_content = f"# {outline.title}\n\n"        guide_content += f"## Introduction\n\n{outline.introduction}\n\n"
        # 按顺序添加每个章节        for section in outline.sections:            section_content = self.state.sections_content.get(section.title, "")            guide_content += f"\n\n{section_content}\n\n"
        # 添加结论        guide_content += f"## Conclusion\n\n{outline.conclusion}\n\n"
        # 保存指南        with open("output/complete_guide.md", "w") as f:            f.write(guide_content)
        print("\nComplete guide compiled and saved to output/complete_guide.md")        return "Guide creation completed successfully"
def kickoff():    """运行 guide creator flow"""    GuideCreatorFlow().kickoff()    print("\n=== Flow Complete ===")    print("Your comprehensive guide is ready in the output directory.")    print("Open output/complete_guide.md to view it.")
def plot():    """生成 flow 可视化图"""    flow = GuideCreatorFlow()    flow.plot("guide_creator_flow")    print("Flow visualization saved to guide_creator_flow.html")
if __name__ == "__main__":    kickoff()
让我们分析一下这个 flow 里发生了什么:
- 我们为结构化数据定义了 Pydantic 模型,确保类型安全和清晰的数据表示
- 我们创建了一个 state 类,用于在 flow 的不同步骤之间维护数据
- 我们实现了三个主要的 flow 步骤:
- 使用
@start()装饰器获取用户输入 - 使用直接 LLM 调用创建指南大纲
- 使用内容 crew 处理章节
- 使用
- 我们使用
@listen()装饰器在步骤之间建立事件驱动关系
这就是 flows 的力量 - 把不同类型的处理(用户交互、直接 LLM 调用、基于 crew 的任务)结合成一个连贯的事件驱动系统。
第 6 步:设置环境变量
Section titled “第 6 步:设置环境变量”在项目根目录创建一个 .env 文件,写入你的 API key。关于如何配置 provider,请参见 LLM 设置指南。
OPENAI_API_KEY=your_openai_api_key# orGEMINI_API_KEY=your_gemini_api_key# orANTHROPIC_API_KEY=your_anthropic_api_key第 7 步:安装依赖
Section titled “第 7 步:安装依赖”安装所需依赖:
crewai install第 8 步:运行你的 Flow
Section titled “第 8 步:运行你的 Flow”现在是时候看看你的 flow 实际运行了!使用 CrewAI CLI 运行它:
crewai run运行这个命令后,你会看到 flow “活”起来:
- 它会提示你输入主题和受众级别
- 它会为你的指南创建结构化大纲
- 它会逐个处理每个章节,由内容写作者和审阅者协同完成
- 最后,它会把所有内容编译成一份完整指南
这展示了 flows 编排复杂流程的能力,其中既有 AI,也有非 AI 组件。
第 9 步:可视化你的 Flow
Section titled “第 9 步:可视化你的 Flow”flows 的一个强大特性是可以把结构可视化:
crewai flow plot这会创建一个 HTML 文件,显示你的 flow 结构,包括不同步骤之间的关系,以及数据如何在它们之间流动。对于理解和调试复杂 flow,这种可视化非常有价值。
第 10 步:检查输出
Section titled “第 10 步:检查输出”flow 完成后,你会在 output 目录中找到两个文件:
guide_outline.json:包含指南的结构化大纲complete_guide.md:包含所有章节的完整指南
花一点时间查看这些文件,并体会你已经构建出的东西 - 一个结合用户输入、直接 AI 交互和协同 agent 工作的系统,能够产出复杂且高质量的结果。
可能性的艺术:超越你的第一个 Flow
Section titled “可能性的艺术:超越你的第一个 Flow”你在本指南中学到的内容,为构建更复杂的 AI 系统打下了基础。下面是一些你可以扩展这个基础 flow 的方式:
增强用户交互
Section titled “增强用户交互”你可以创建更具交互性的 flows,例如:
- 用于输入和输出的 Web 界面
- 实时进度更新
- 交互式反馈与细化循环
- 多阶段用户交互
添加更多处理步骤
Section titled “添加更多处理步骤”你可以通过以下步骤扩展 flow:
- 在创建大纲之前进行调研
- 为插图生成图片
- 为技术指南生成代码片段
- 最终质量保证和事实核查
创建更复杂的 Flows
Section titled “创建更复杂的 Flows”你可以实现更复杂的 flow 模式:
- 根据用户偏好或内容类型进行条件分支
- 对独立章节进行并行处理
- 结合反馈的迭代优化循环
- 与外部 API 和服务集成
应用于不同领域
Section titled “应用于不同领域”同样的模式可以用于创建以下类型的 flows:
- 交互式讲故事:根据用户输入创建个性化故事
- 商业智能:处理数据、生成洞察并创建报告
- 产品开发:促进构思、设计和规划
- 教育系统:创建个性化学习体验
演示的关键功能
Section titled “演示的关键功能”这个 guide creator flow 展示了 CrewAI 的几个强大功能:
- 用户交互:Flow 直接收集用户输入
- 直接 LLM 调用:使用 LLM 类实现高效、单用途的 AI 交互
- 使用 Pydantic 的结构化数据:通过 Pydantic 模型确保类型安全
- 带上下文的顺序处理:按顺序编写章节,并提供前文作为上下文
- 多 agent crews:利用专门化 agent(写作者和审阅者)进行内容创作
- 状态管理:在过程的不同步骤之间维护状态
- 事件驱动架构:使用
@listen装饰器响应事件
理解 Flow 结构
Section titled “理解 Flow 结构”让我们拆解 flows 的关键组件,帮助你理解如何构建自己的 flow:
1. 直接 LLM 调用
Section titled “1. 直接 LLM 调用”当你需要简单、结构化的响应时,flows 可以直接调用语言模型:
llm = LLM( model="model-id-here", # gpt-4o, gemini-2.0-flash, anthropic/claude... response_format=GuideOutline)response = llm.call(messages=messages)当你需要特定的结构化输出时,这比使用 crew 更高效。
2. 事件驱动架构
Section titled “2. 事件驱动架构”Flows 使用装饰器在组件之间建立关系:
@start()def get_user_input(self):    # flow 中的第一步    # ...
@listen(get_user_input)def create_guide_outline(self, state):    # 当 get_user_input 完成后运行    # ...
这为你的应用创建了清晰、声明式的结构。
3. 状态管理
Section titled “3. 状态管理”Flows 会在步骤之间维护状态,让共享数据变得容易:
class GuideCreatorState(BaseModel): topic: str = "" audience_level: str = "" guide_outline: GuideOutline = None sections_content: Dict[str, str] = {}这提供了一种类型安全的方式,用于跟踪和转换 flow 中的数据。
4. Crew 集成
Section titled “4. Crew 集成”Flows 可以无缝集成 crews,处理复杂协作任务:
result = kickoff_content_crew(inputs={ "section_title": section.title, # ...})这让你可以为应用的不同部分使用合适的工具 - 简单任务用直接 LLM 调用,复杂协作用 crews。
现在你已经构建了第一个 flow,可以:
- 尝试更复杂的 flow 结构和模式
- 试试使用
@router()在 flow 中创建条件分支 - 探索
and_和or_函数,实现更复杂的并行执行 - 将 flow 连接到外部 API、数据库或用户界面
- 在一个 flow 中组合多个专门化 crew
- 使用 Conversational Flows 构建多轮聊天应用(每条消息一次
kickoff、ChatSession、延迟 tracing)