HubSpot Trigger
This guide provides a step-by-step process to set up HubSpot triggers for CrewAI AMP, enabling you to initiate crews directly from HubSpot Workflows.
Prerequisites
Section titled “Prerequisites”- A CrewAI AMP account
- A HubSpot account with the HubSpot Workflows feature
Setup Steps
Section titled “Setup Steps”- Connect your HubSpot account with CrewAI AMP
- Log in to your
CrewAI AMP account > Triggers- SelectHubSpotfrom the list of available triggers - Choose the HubSpot account you want to connect with CrewAI AMP - Follow the on-screen prompts to authorize CrewAI AMP access to your HubSpot account - A confirmation message will appear once HubSpot is successfully connected with CrewAI AMP
- Log in to your
- Create a HubSpot Workflow
- Log in to your
HubSpot account > Automations > Workflows > New workflow - Select the workflow type that fits your needs (e.g., Start from scratch) -
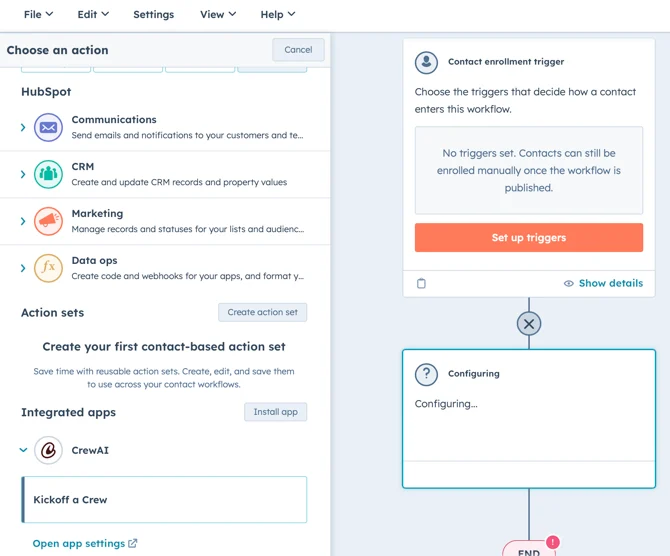
In the workflow builder, click the Plus (+) icon to add a new action. -
Choose
Integrated apps > CrewAI > Kickoff a Crew. - Select the Crew you want to initiate. - ClickSaveto add the action to your workflow
- Log in to your
- Use Crew results with other actions
- After the Kickoff a Crew step, click the Plus (+) icon to add a new
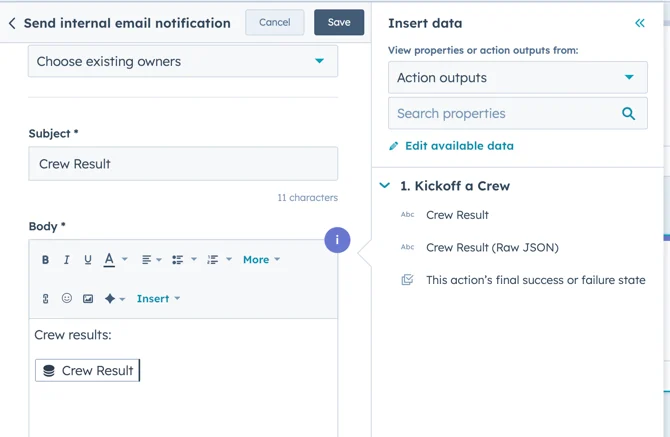
action. - For example, to send an internal email notification, choose
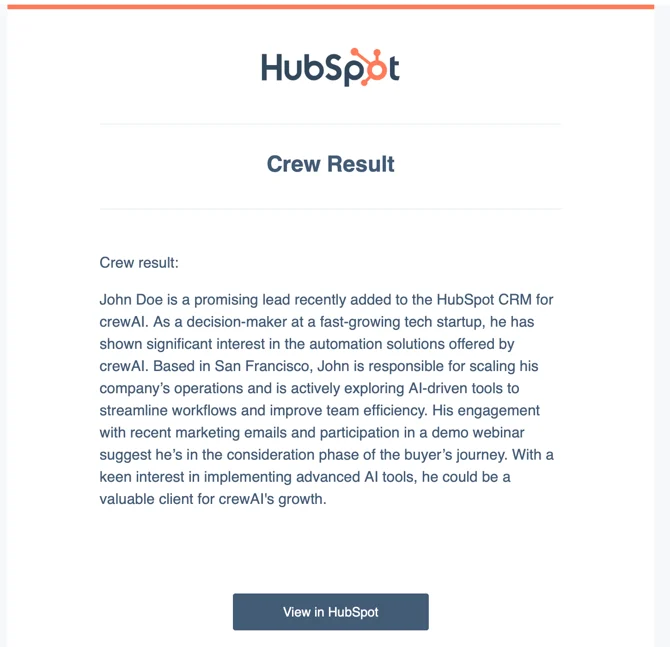
Communications > Send internal email notification- In the Body field, clickInsert data, selectView properties or action outputs from > Action outputs > Crew Resultto include Crew data in the email
- Configure any additional actions as needed - Review your workflow
steps to ensure everything is set up correctly - Activate the workflow
- After the Kickoff a Crew step, click the Plus (+) icon to add a new
action. - For example, to send an internal email notification, choose
For more detailed information on available actions and customization options, refer to the HubSpot Workflows Documentation.