Deploy to AMP
Prerequisites
Section titled “Prerequisites”Project Ready for Deployment
You should have a working Crew or Flow that runs successfully locally. Follow our preparation guide to verify your project structure.
GitHub Repository
Your code should be in a GitHub repository (for GitHub integration method)
Option 1: Deploy Using CrewAI CLI
Section titled “Option 1: Deploy Using CrewAI CLI”The CLI provides the fastest way to deploy locally developed Crews or Flows to the AMP platform.
The CLI automatically detects your project type from pyproject.toml and builds accordingly.
- Install CrewAI CLI
If you haven’t already, install the CrewAI CLI:
Terminal window pip install crewai[tools] - Authenticate with the Enterprise Platform
First, you need to authenticate your CLI with the CrewAI AMP platform:
Terminal window # If you already have a CrewAI AMP account, or want to create one:crewai loginWhen you run either command, the CLI will:
- Display a URL and a unique device code
- Open your browser to the authentication page
- Prompt you to confirm the device
- Complete the authentication process
Upon successful authentication, you’ll see a confirmation message in your terminal!
- Create a Deployment
From your project directory, run:
Terminal window crewai deploy createThis command will:
- Detect your GitHub repository information
- Identify environment variables in your local
.envfile - Securely transfer these variables to the Enterprise platform
- Create a new deployment with a unique identifier
On successful creation, you’ll see a message like:
Terminal window Deployment created successfully!Name: your_project_nameDeployment ID: 01234567-89ab-cdef-0123-456789abcdefCurrent Status: Deploy Enqueued - Monitor Deployment Progress
Track the deployment status with:
Terminal window crewai deploy statusFor detailed logs of the build process:
Terminal window crewai deploy logs
Additional CLI Commands
Section titled “Additional CLI Commands”The CrewAI CLI offers several commands to manage your deployments:
# List all your deploymentscrewai deploy list
# Get the status of your deploymentcrewai deploy status
# View the logs of your deploymentcrewai deploy logs
# Push updates after code changescrewai deploy push
# Remove a deploymentcrewai deploy remove <deployment_id>
Option 2: Deploy Directly via Web Interface
Section titled “Option 2: Deploy Directly via Web Interface”You can also deploy your Crews or Flows directly through the CrewAI AMP web interface by connecting your GitHub account. This approach doesn’t require using the CLI on your local machine. The platform automatically detects your project type and handles the build appropriately.
- Pushing to GitHub
You need to push your crew to a GitHub repository. If you haven’t created a crew yet, you can follow this tutorial.
- Connecting GitHub to CrewAI AMP
- Log in to CrewAI AMP
- Click on the button “Connect GitHub”
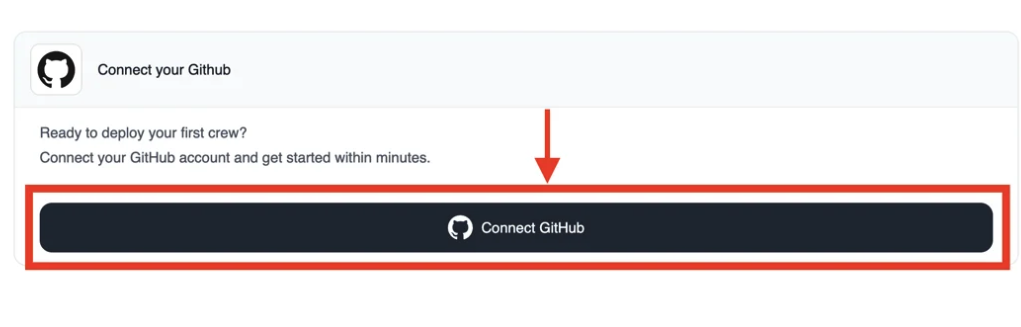
- Select the Repository
After connecting your GitHub account, you’ll be able to select which repository to deploy:
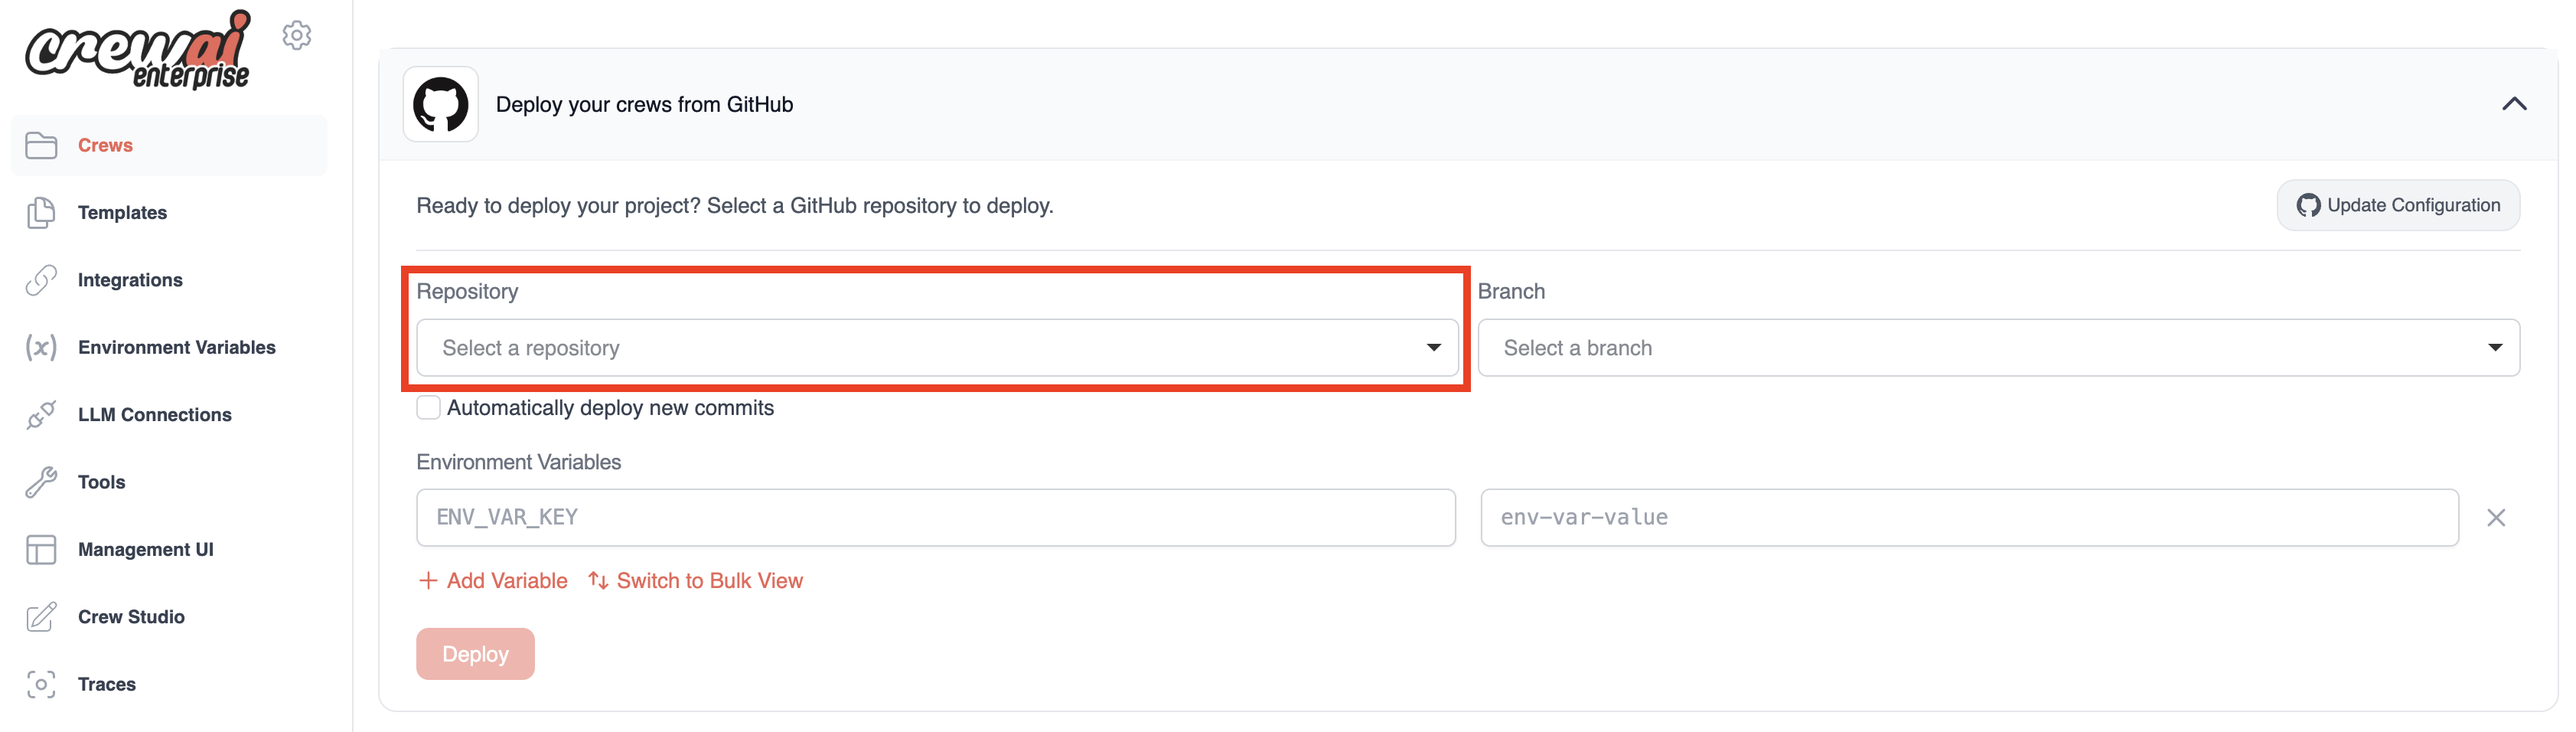
- Set Environment Variables
Before deploying, you’ll need to set up your environment variables to connect to your LLM provider or other services:
- You can add variables individually or in bulk
- Enter your environment variables in
KEY=VALUEformat (one per line)

- Deploy Your Crew
- Click the “Deploy” button to start the deployment process
- You can monitor the progress through the progress bar
- The first deployment typically takes around 1 minute
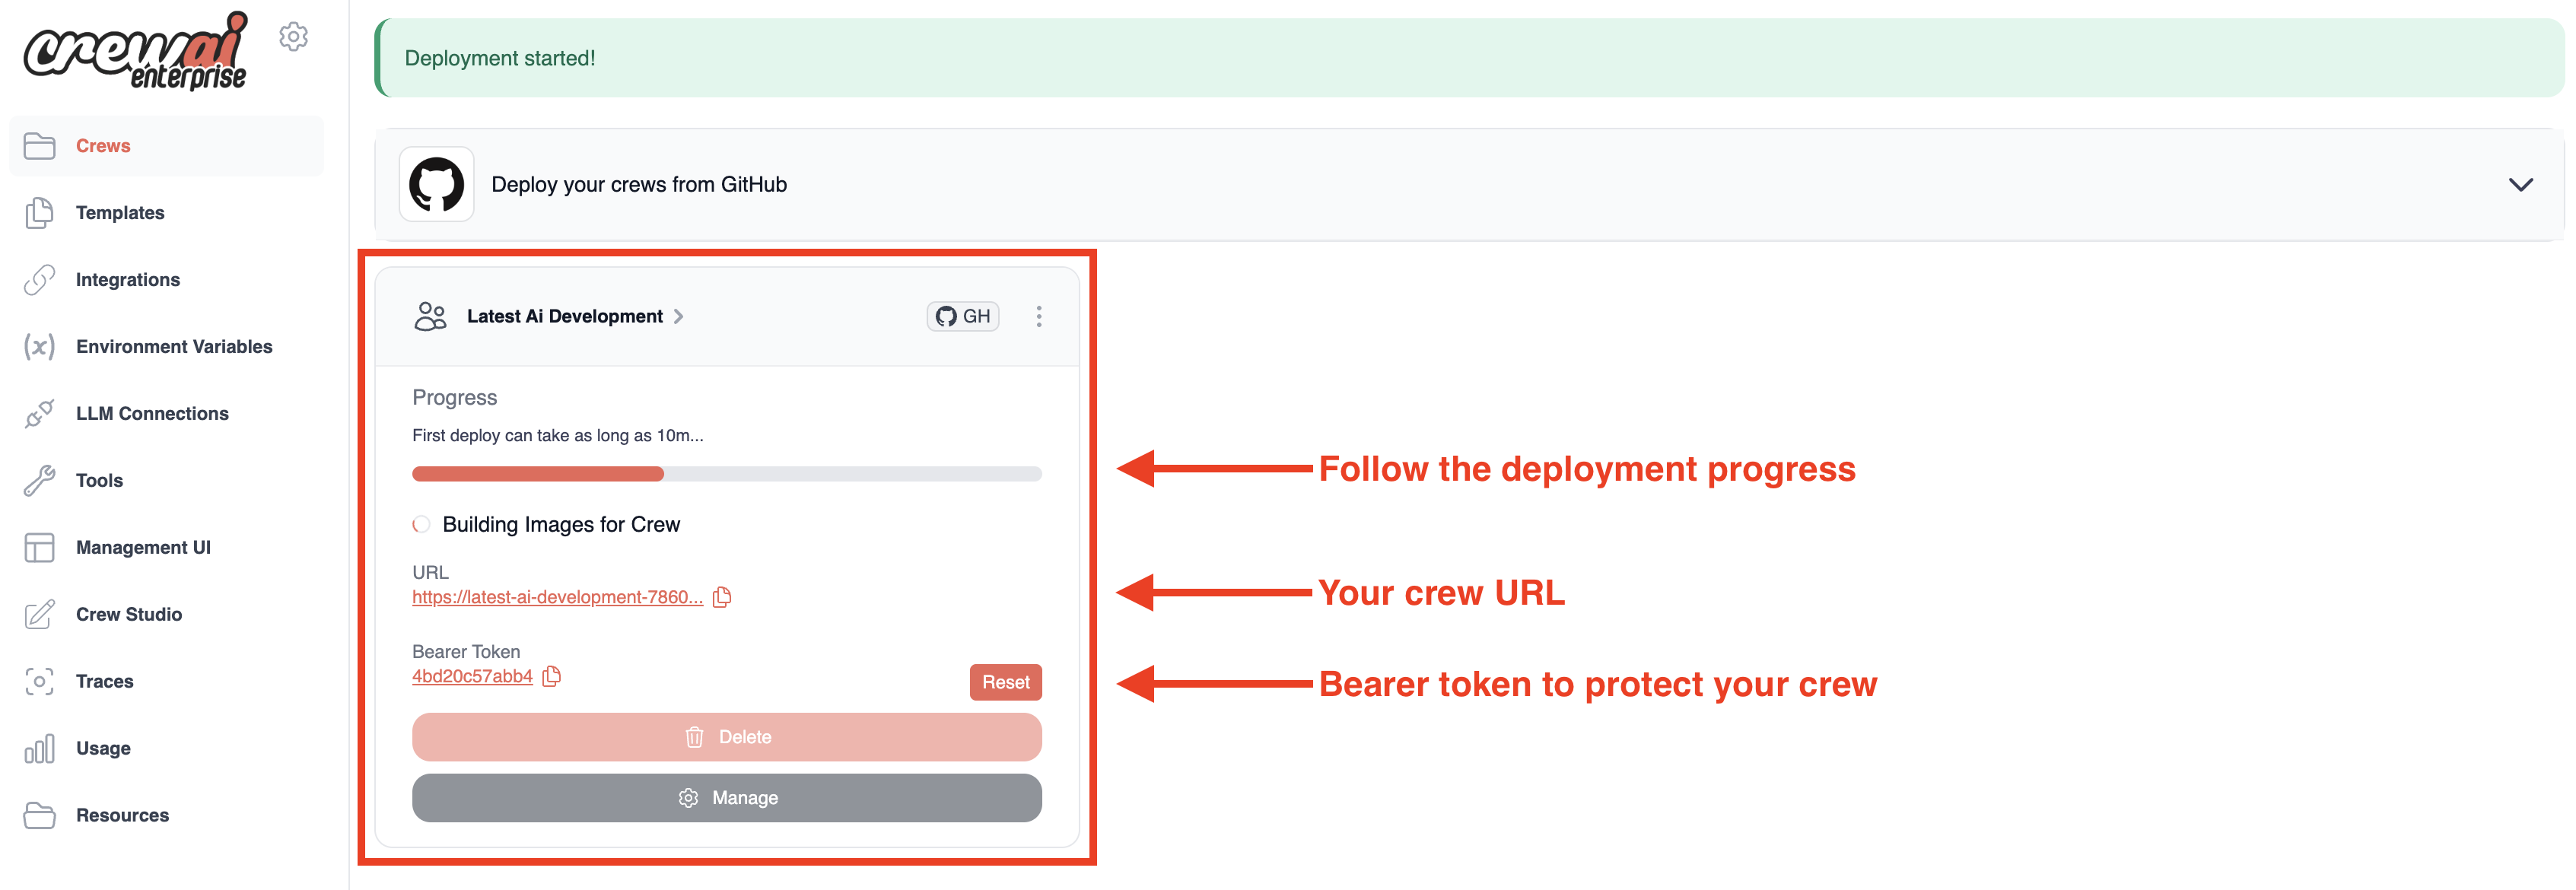
Once deployment is complete, you’ll see:
- Your crew’s unique URL
- A Bearer token to protect your crew API
- A “Delete” button if you need to remove the deployment
Option 3: Redeploy Using API (CI/CD Integration)
Section titled “Option 3: Redeploy Using API (CI/CD Integration)”For automated deployments in CI/CD pipelines, you can use the CrewAI API to trigger redeployments of existing crews. This is particularly useful for GitHub Actions, Jenkins, or other automation workflows.
- Get Your Personal Access Token
Navigate to your CrewAI AMP account settings to generate an API token:
- Go to app.crewai.com
- Click on Settings → Account → Personal Access Token
- Generate a new token and copy it securely
- Store this token as a secret in your CI/CD system
- Find Your Automation UUID
Locate the unique identifier for your deployed crew:
- Go to Automations in your CrewAI AMP dashboard
- Select your existing automation/crew
- Click on Additional Details
- Copy the UUID - this identifies your specific crew deployment
- Trigger Redeployment via API
Use the Deploy API endpoint to trigger a redeployment:
Terminal window curl -i -X POST \-H "Authorization: Bearer YOUR_PERSONAL_ACCESS_TOKEN" \https://app.crewai.com/crewai_plus/api/v1/crews/YOUR-AUTOMATION-UUID/deploy# HTTP/2 200# content-type: application/json## {# "uuid": "your-automation-uuid",# "status": "Deploy Enqueued",# "public_url": "https://your-crew-deployment.crewai.com",# "token": "your-bearer-token"# } - GitHub Actions Integration Example
Here’s a GitHub Actions workflow with more complex deployment triggers:
name: Deploy CrewAI Automationon:push:branches: [ main ]pull_request:types: [ labeled ]release:types: [ published ]jobs:deploy:runs-on: ubuntu-latestif: |(github.event_name == 'push' && github.ref == 'refs/heads/main') ||(github.event_name == 'pull_request' && contains(github.event.pull_request.labels.*.name, 'deploy')) ||(github.event_name == 'release')steps:- name: Trigger CrewAI Redeploymentrun: |curl -X POST \-H "Authorization: Bearer ${{ secrets.CREWAI_PAT }}" \https://app.crewai.com/crewai_plus/api/v1/crews/${{ secrets.CREWAI_AUTOMATION_UUID }}/deploy
Interact with Your Deployed Automation
Section titled “Interact with Your Deployed Automation”Once deployment is complete, you can access your crew through:
-
REST API: The platform generates a unique HTTPS endpoint with these key routes:
/inputs: Lists the required input parameters/kickoff: Initiates an execution with provided inputs/status/{kickoff_id}: Checks the execution status
-
Web Interface: Visit app.crewai.com to access:
- Status tab: View deployment information, API endpoint details, and authentication token
- Run tab: Visual representation of your crew’s structure
- Executions tab: History of all executions
- Metrics tab: Performance analytics
- Traces tab: Detailed execution insights
Trigger an Execution
Section titled “Trigger an Execution”From the Enterprise dashboard, you can:
- Click on your crew’s name to open its details
- Select “Trigger Crew” from the management interface
- Enter the required inputs in the modal that appears
- Monitor progress as the execution moves through the pipeline
Monitoring and Analytics
Section titled “Monitoring and Analytics”The Enterprise platform provides comprehensive observability features:
- Execution Management: Track active and completed runs
- Traces: Detailed breakdowns of each execution
- Metrics: Token usage, execution times, and costs
- Timeline View: Visual representation of task sequences
Advanced Features
Section titled “Advanced Features”The Enterprise platform also offers:
- Environment Variables Management: Securely store and manage API keys
- LLM Connections: Configure integrations with various LLM providers
- Custom Tools Repository: Create, share, and install tools
- Crew Studio: Build crews through a chat interface without writing code
Troubleshooting Deployment Failures
Section titled “Troubleshooting Deployment Failures”If your deployment fails, check these common issues:
Build Failures
Section titled “Build Failures”Missing uv.lock File
Section titled “Missing uv.lock File”Symptom: Build fails early with dependency resolution errors
Solution: Generate and commit the lock file:
uv lockgit add uv.lockgit commit -m "Add uv.lock for deployment"git pushWrong Project Structure
Section titled “Wrong Project Structure”Symptom: “Could not find entry point” or “Module not found” errors
Solution: Verify your project matches the expected structure:
- JSON-first Crews: Keep
crew.jsoncorcrew.jsonandagents/at the project root - Classic Crews: Use
src/project_name/main.pywith arun()entry point - Flows: Use
src/project_name/main.pywith akickoff()entry point
See Prepare for Deployment for detailed structure diagrams.
Missing CrewBase Decorator in a Classic Crew
Section titled “Missing CrewBase Decorator in a Classic Crew”Symptom: “Crew not found”, “Config not found”, or agent/task configuration errors
Solution: For classic Python/YAML crews, ensure all crew classes use the @CrewBase decorator. JSON-first crews do not need this decorator.
from crewai.project import CrewBase, agent, crew, task
@CrewBase  # This decorator is REQUIREDclass YourCrew():    """Your crew description"""
    @agent    def my_agent(self) -> Agent:        return Agent(            config=self.agents_config['my_agent'],  # type: ignore[index]            verbose=True        )
# ... rest of crew definitionIncorrect pyproject.toml Type
Section titled “Incorrect pyproject.toml Type”Symptom: Build succeeds but runtime fails, or unexpected behavior
Solution: Verify the [tool.crewai] section matches your project type:
# For Crew projects:[tool.crewai]type = "crew"
# For Flow projects:[tool.crewai]type = "flow"
Runtime Failures
Section titled “Runtime Failures”LLM Connection Failures
Section titled “LLM Connection Failures”Symptom: API key errors, “model not found”, or authentication failures
Solution:
- Verify your LLM provider’s API key is correctly set in environment variables
- Ensure the environment variable names match what your code expects
- Test locally with the exact same environment variables before deploying
Crew Execution Errors
Section titled “Crew Execution Errors”Symptom: Crew starts but fails during execution
Solution:
- Check the execution logs in the AMP dashboard (Traces tab)
- Verify all tools have required API keys configured
- For JSON-first crews, validate
crew.jsoncand the referenced files inagents/ - For classic crews, ensure
agents.yamlandtasks.yamlare valid
Need Help?
Contact our support team for assistance with deployment issues or questions about the AMP platform.