첫 Flow 빌드하기
Flows로 AI 워크플로우 제어하기
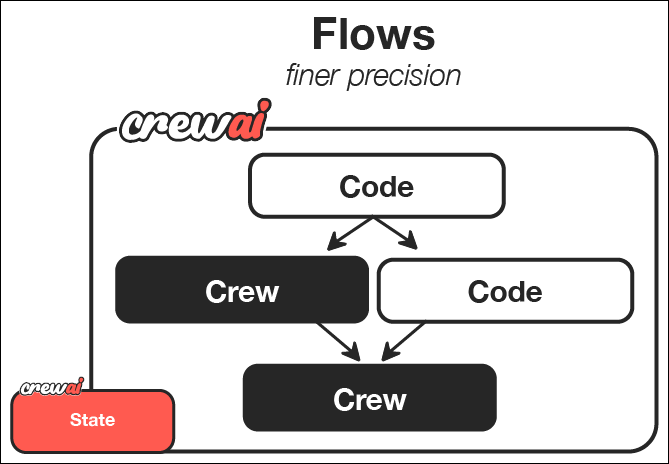
섹션 제목: “Flows로 AI 워크플로우 제어하기”CrewAI Flows는 AI 오케스트레이션의 새로운 수준을 제공합니다. 즉, AI agent crew의 협업 능력과 절차적 프로그래밍의 정밀성 및 유연성을 결합합니다. crew가 agent 협업에서 탁월하다면, flow는 AI 시스템의 다양한 구성요소가 어떻게 그리고 언제 상호작용하는지에 대해 세밀하게 제어할 수 있게 해줍니다.
이 가이드에서는 원하는 주제에 대한 포괄적인 학습 가이드를 생성하는 강력한 CrewAI Flow를 만드는 과정을 소개합니다. 이 튜토리얼을 통해 Flow가 일반 코드, 직접적인 LLM 호출, crew 기반 처리 등을 결합하여 AI 워크플로우에 구조적이고 이벤트 기반의 제어를 제공하는 방법을 시연할 것입니다.
플로우의 강력한 점
섹션 제목: “플로우의 강력한 점”플로우를 통해 다음과 같은 작업을 할 수 있습니다:
- 다양한 AI 상호작용 패턴 결합 - 복잡한 협업 작업에는 crew를 사용하고, 더 단순한 작업에는 직접적인 LLM 호출과 절차적 논리에는 일반 코드를 사용하세요.
- 이벤트 기반 시스템 구축 - 구성 요소가 특정 이벤트와 데이터 변경에 어떻게 반응할지 정의할 수 있습니다.
- 구성 요소 간 상태 유지 - 애플리케이션의 다양한 부분 간에 데이터를 공유하고 변환할 수 있습니다.
- 외부 시스템과 통합 - 데이터베이스, API, 사용자 인터페이스와 같은 외부 시스템과 AI 워크플로우를 원활하게 연동할 수 있습니다.
- 복잡한 실행 경로 생성 - 조건부 분기, 병렬 처리 및 동적인 워크플로우를 설계할 수 있습니다.
무엇을 구축하고 배우게 될까요
섹션 제목: “무엇을 구축하고 배우게 될까요”이 가이드가 끝나면 여러분은 다음을 달성할 수 있습니다:
- 사용자 입력, AI 계획, 그리고 멀티 에이전트 콘텐츠 생성이 결합된 정교한 콘텐츠 생성 시스템을 구축했습니다.
- **시스템의 다양한 구성 요소 간 정보 흐름을 오케스트레이션(조율)**했습니다.
- 이전 단계의 완료에 따라 각 단계가 반응하는 이벤트 기반 아키텍처를 구현했습니다.
- 더 복잡한 AI 애플리케이션을 확장하고 맞춤화할 수 있는 기반을 구축했습니다.
이번 가이드의 creator flow는 다음과 같은 훨씬 더 발전된 애플리케이션에 적용할 수 있는 기본 패턴을 보여줍니다:
- 여러 전문화된 하위 시스템을 결합하는 대화형 AI assistant
- AI 기반 변환을 포함한 복잡한 데이터 처리 파이프라인
- 외부 서비스 및 API와 통합되는 자율적 에이전트
- 인간이 개입하는 프로세스를 포함한 다단계 의사결정 시스템
함께 여러분의 첫 번째 flow를 만들어 봅시다!
사전 준비 사항
섹션 제목: “사전 준비 사항”시작하기 전에 다음을 확인하세요:
- 설치 가이드에 따라 CrewAI를 설치했는지 확인하십시오.
- LLM 설정 가이드에 따라 환경에 LLM API 키를 설정했는지 확인하십시오.
- Python에 대한 기본적인 이해
1단계: 새로운 CrewAI Flow 프로젝트 생성
섹션 제목: “1단계: 새로운 CrewAI Flow 프로젝트 생성”먼저, CLI를 사용하여 새로운 CrewAI Flow 프로젝트를 생성해봅시다. 이 명령어는 필요한 모든 디렉터리와 템플릿 파일이 포함된 기본 프로젝트 구조를 만들어줍니다.
crewai create flow guide_creator_flowcd guide_creator_flow이렇게 하면 flow에 필요한 기본 구조를 가진 프로젝트가 생성됩니다.
2단계: 프로젝트 구조 이해하기
섹션 제목: “2단계: 프로젝트 구조 이해하기”생성된 프로젝트는 다음과 같은 구조를 가지고 있습니다. 시작용 embedded crew는 클래식 Python/YAML 레이아웃을 사용합니다. Flow 안에서 JSON-first crew를 사용하려면 crew 폴더에 crew.jsonc와 agents/*.jsonc를 만들고 crewai.project.load_crew로 로드하세요. 예시는 Flows를 참고하세요.
guide_creator_flow/├── .gitignore├── pyproject.toml├── README.md├── .env└── src/ └── guide_creator_flow/ ├── __init__.py ├── main.py ├── crews/ │ └── poem_crew/ │ ├── config/ │ │ ├── agents.yaml │ │ └── tasks.yaml │ └── poem_crew.py └── tools/ └── custom_tool.py이 구조는 flow의 다양한 구성 요소를 명확하게 분리해줍니다:
src/guide_creator_flow/main.py파일의 main flow 로직src/guide_creator_flow/crews디렉터리의 특화된 crew들src/guide_creator_flow/tools디렉터리의 custom tool들
이제 이 구조를 수정하여 guide creator flow를 만들 것입니다. 이 flow는 포괄적인 학습 가이드 생성을 조직하는 역할을 합니다.
3단계: Content Writer Crew 추가
섹션 제목: “3단계: Content Writer Crew 추가”우리 flow에는 콘텐츠 생성 프로세스를 처리할 전문화된 crew가 필요합니다. CrewAI CLI를 사용하여 content writer crew를 추가해봅시다:
crewai flow add-crew content-crew이 명령어는 자동으로 crew에 필요한 디렉터리와 템플릿 파일을 생성합니다. content writer crew는 가이드의 각 섹션을 작성하고 검토하는 역할을 담당하며, 메인 애플리케이션에 의해 조율되는 전체 flow 내에서 작업하게 됩니다.
4단계: 콘텐츠 작가 Crew 구성
섹션 제목: “4단계: 콘텐츠 작가 Crew 구성”이제 콘텐츠 작가 crew를 JSONC로 구성합니다. 가이드의 고품질 콘텐츠를 만들기 위해 협업하는 두 명의 전문 에이전트 - 작가와 리뷰어 - 를 설정합니다.
src/guide_creator_flow/crews/content_crew/agents/content_writer.jsonc를 만듭니다:
{ "role": "Educational Content Writer", "goal": "Create engaging, informative content that thoroughly explains the assigned topic and provides valuable insights to the reader.", "backstory": "You are a talented educational writer who explains complex concepts in accessible language and organizes information clearly.", "llm": "provider/model-id", "settings": { "verbose": true }}src/guide_creator_flow/crews/content_crew/agents/content_reviewer.jsonc를 만듭니다:
{ "role": "Educational Content Reviewer and Editor", "goal": "Ensure content is accurate, comprehensive, well-structured, and consistent with previously written sections.", "backstory": "You are a meticulous editor with an eye for detail, clarity, and coherence.", "llm": "provider/model-id", "settings": { "verbose": true }}provider/model-id를 사용하는 모델로 바꾸세요. 예: openai/gpt-4o, gemini/gemini-2.0-flash-001, anthropic/claude-sonnet-4-6.
src/guide_creator_flow/crews/content_crew/crew.jsonc를 만듭니다:
{ "name": "Content Crew", "agents": ["content_writer", "content_reviewer"], "tasks": [ { "name": "write_section_task", "description": "Write a comprehensive section on the topic: \"{section_title}\".\n\nSection description: {section_description}\nTarget audience: {audience_level} level learners\n\nYour content should begin with a brief introduction, explain key concepts clearly with examples, include practical applications where appropriate, end with a summary, and be approximately 500-800 words.\n\nPreviously written sections:\n{previous_sections}", "expected_output": "A well-structured, comprehensive section in Markdown format that thoroughly explains the topic and is appropriate for the target audience.", "agent": "content_writer", "markdown": true }, { "name": "review_section_task", "description": "Review and improve this section on \"{section_title}\":\n\n{draft_content}\n\nTarget audience: {audience_level} level learners\nPreviously written sections:\n{previous_sections}\n\nFix errors, improve clarity, verify consistency, enhance structure, and add missing key information.", "expected_output": "An improved, polished version of the section that maintains the original structure but enhances clarity, accuracy, and consistency.", "agent": "content_reviewer", "context": ["write_section_task"], "markdown": true } ], "process": "sequential", "verbose": true}context 필드를 통해 리뷰어가 작가의 출력을 사용할 수 있습니다.
src/guide_creator_flow/crews/content_crew/content_crew.py를 작은 loader로 교체합니다:
from pathlib import Path
from crewai.project import load_crew

def kickoff_content_crew(inputs: dict):    crew, default_inputs = load_crew(Path(__file__).with_name("crew.jsonc"))    return crew.kickoff(inputs={**default_inputs, **inputs})
이 loader는 런타임에 crew.jsonc를 Crew로 바꿉니다. 이 crew는 독립적으로도 작동할 수 있지만, 우리의 플로우에서는 더 큰 시스템의 일부로 오케스트레이션됩니다.
5단계: 플로우(Flow) 생성
섹션 제목: “5단계: 플로우(Flow) 생성”이제 가장 흥미로운 부분입니다 - 전체 가이드 생성 과정을 오케스트레이션할 플로우를 만드는 단계입니다. 이곳에서 우리는 일반 Python 코드, 직접적인 LLM 호출, 그리고 우리의 컨텐츠 제작 crew를 결합하여 일관된 시스템으로 만듭니다.
우리의 플로우는 다음과 같은 일을 수행합니다:
- 주제와 대상 독자 수준에 대한 사용자 입력을 받습니다.
- 구조화된 가이드 개요를 만들기 위해 직접 LLM 호출을 합니다.
- 컨텐츠 writer crew를 사용하여 각 섹션을 순차적으로 처리합니다.
- 모든 내용을 결합하여 최종 종합 문서를 완성합니다.
main.py 파일에 우리의 플로우를 생성해봅시다:
#!/usr/bin/env pythonimport jsonimport osfrom typing import List, Dictfrom pydantic import BaseModel, Fieldfrom crewai import LLMfrom crewai.flow.flow import Flow, listen, startfrom guide_creator_flow.crews.content_crew.content_crew import kickoff_content_crew
# Define our models for structured dataclass Section(BaseModel):    title: str = Field(description="Title of the section")    description: str = Field(description="Brief description of what the section should cover")
class GuideOutline(BaseModel):    title: str = Field(description="Title of the guide")    introduction: str = Field(description="Introduction to the topic")    target_audience: str = Field(description="Description of the target audience")    sections: List[Section] = Field(description="List of sections in the guide")    conclusion: str = Field(description="Conclusion or summary of the guide")
# Define our flow stateclass GuideCreatorState(BaseModel):    topic: str = ""    audience_level: str = ""    guide_outline: GuideOutline = None    sections_content: Dict[str, str] = {}
class GuideCreatorFlow(Flow[GuideCreatorState]):    """Flow for creating a comprehensive guide on any topic"""
    @start()    def get_user_input(self):        """Get input from the user about the guide topic and audience"""        print("\n=== Create Your Comprehensive Guide ===\n")
        # Get user input        self.state.topic = input("What topic would you like to create a guide for? ")
        # Get audience level with validation        while True:            audience = input("Who is your target audience? (beginner/intermediate/advanced) ").lower()            if audience in ["beginner", "intermediate", "advanced"]:                self.state.audience_level = audience                break            print("Please enter 'beginner', 'intermediate', or 'advanced'")
        print(f"\nCreating a guide on {self.state.topic} for {self.state.audience_level} audience...\n")        return self.state
    @listen(get_user_input)    def create_guide_outline(self, state):        """Create a structured outline for the guide using a direct LLM call"""        print("Creating guide outline...")
        # Initialize the LLM        llm = LLM(model="openai/gpt-4o-mini", response_format=GuideOutline)
        # Create the messages for the outline        messages = [            {"role": "system", "content": "You are a helpful assistant designed to output JSON."},            {"role": "user", "content": f"""            Create a detailed outline for a comprehensive guide on "{state.topic}" for {state.audience_level} level learners.
            The outline should include:            1. A compelling title for the guide            2. An introduction to the topic            3. 4-6 main sections that cover the most important aspects of the topic            4. A conclusion or summary
            For each section, provide a clear title and a brief description of what it should cover.            """}        ]
        # Make the LLM call with JSON response format        response = llm.call(messages=messages)
        # Parse the JSON response        outline_dict = json.loads(response)        self.state.guide_outline = GuideOutline(**outline_dict)
        # Ensure output directory exists before saving        os.makedirs("output", exist_ok=True)
        # Save the outline to a file        with open("output/guide_outline.json", "w") as f:            json.dump(outline_dict, f, indent=2)
        print(f"Guide outline created with {len(self.state.guide_outline.sections)} sections")        return self.state.guide_outline
    @listen(create_guide_outline)    def write_and_compile_guide(self, outline):        """Write all sections and compile the guide"""        print("Writing guide sections and compiling...")        completed_sections = []
        # Process sections one by one to maintain context flow        for section in outline.sections:            print(f"Processing section: {section.title}")
            # Build context from previous sections            previous_sections_text = ""            if completed_sections:                previous_sections_text = "# Previously Written Sections\n\n"                for title in completed_sections:                    previous_sections_text += f"## {title}\n\n"                    previous_sections_text += self.state.sections_content.get(title, "") + "\n\n"            else:                previous_sections_text = "No previous sections written yet."
            # Run the content crew for this section            result = kickoff_content_crew(inputs={                "section_title": section.title,                "section_description": section.description,                "audience_level": self.state.audience_level,                "previous_sections": previous_sections_text,                "draft_content": ""            })
            # Store the content            self.state.sections_content[section.title] = result.raw            completed_sections.append(section.title)            print(f"Section completed: {section.title}")
        # Compile the final guide        guide_content = f"# {outline.title}\n\n"        guide_content += f"## Introduction\n\n{outline.introduction}\n\n"
        # Add each section in order        for section in outline.sections:            section_content = self.state.sections_content.get(section.title, "")            guide_content += f"\n\n{section_content}\n\n"
        # Add conclusion        guide_content += f"## Conclusion\n\n{outline.conclusion}\n\n"
        # Save the guide        with open("output/complete_guide.md", "w") as f:            f.write(guide_content)
        print("\nComplete guide compiled and saved to output/complete_guide.md")        return "Guide creation completed successfully"
def kickoff():    """Run the guide creator flow"""    GuideCreatorFlow().kickoff()    print("\n=== Flow Complete ===")    print("Your comprehensive guide is ready in the output directory.")    print("Open output/complete_guide.md to view it.")
def plot():    """Generate a visualization of the flow"""    flow = GuideCreatorFlow()    flow.plot("guide_creator_flow")    print("Flow visualization saved to guide_creator_flow.html")
if __name__ == "__main__":    kickoff()
이 플로우에서 일어나는 과정을 분석해봅시다:
- 구조화된 데이터에 대한 Pydantic 모델을 정의하여 타입 안전성과 명확한 데이터 표현을 보장합니다.
- 플로우 단계별로 데이터를 유지하기 위한 state 클래스를 생성합니다.
- 세 가지 주요 플로우 단계를 구현합니다:
@start()데코레이터로 사용자 입력을 받습니다.- 직접 LLM 호출로 가이드 개요를 생성합니다.
- content crew로 각 섹션을 처리합니다.
@listen()데코레이터를 활용해 단계 간 이벤트 기반 관계를 설정합니다.
이것이 바로 flows의 힘입니다 - 다양한 처리 유형(사용자 상호작용, 직접적인 LLM 호출, crew 기반 작업)을 하나의 일관된 이벤트 기반 시스템으로 결합할 수 있습니다.
6단계: 환경 변수 설정하기
섹션 제목: “6단계: 환경 변수 설정하기”프로젝트 루트에 .env 파일을 생성하고 API 키를 입력하세요. 공급자 구성에 대한 자세한 내용은 LLM 설정 가이드를 참고하세요.
OPENAI_API_KEY=your_openai_api_key# orGEMINI_API_KEY=your_gemini_api_key# orANTHROPIC_API_KEY=your_anthropic_api_key7단계: 의존성 설치
섹션 제목: “7단계: 의존성 설치”필수 의존성을 설치합니다:
crewai install8단계: Flow 실행하기
섹션 제목: “8단계: Flow 실행하기”이제 여러분의 flow가 실제로 작동하는 모습을 볼 차례입니다! CrewAI CLI를 사용하여 flow를 실행하세요:
crewai run이 명령어를 실행하면 flow가 다음과 같이 작동하는 것을 확인할 수 있습니다:
- 주제와 대상 수준을 입력하라는 메시지가 표시됩니다.
- 가이드의 체계적인 개요를 생성합니다.
- 각 섹션을 처리할 때 content writer와 reviewer가 협업합니다.
- 마지막으로 모든 내용을 종합하여 완성도 높은 가이드를 만듭니다.
이는 여러 구성요소(인공지능 및 비인공지능 모두)가 포함된 복잡한 프로세스를 flows가 어떻게 조정할 수 있는지 보여줍니다.
9단계: Flow 시각화하기
섹션 제목: “9단계: Flow 시각화하기”flow의 강력한 기능 중 하나는 구조를 시각화할 수 있다는 점입니다.
crewai flow plot이 명령은 flow의 구조를 보여주는 HTML 파일을 생성하며, 각 단계 간의 관계와 그 사이에 흐르는 데이터를 확인할 수 있습니다. 이러한 시각화는 복잡한 flow를 이해하고 디버깅하는 데 매우 유용합니다.
10단계: 출력물 검토하기
섹션 제목: “10단계: 출력물 검토하기”flow가 완료되면 output 디렉토리에서 두 개의 파일을 찾을 수 있습니다:
guide_outline.json: 가이드의 구조화된 개요가 포함되어 있습니다complete_guide.md: 모든 섹션이 포함된 종합적인 가이드입니다
이 파일들을 잠시 검토하고 여러분이 구축한 시스템을 되돌아보세요. 이 시스템은 사용자 입력, 직접적인 AI 상호작용, 협업 에이전트 작업을 결합하여 복잡하고 고품질의 결과물을 만들어냅니다.
가능한 것의 예술: 첫 번째 Flow 그 이상
섹션 제목: “가능한 것의 예술: 첫 번째 Flow 그 이상”이 가이드에서 배운 내용은 훨씬 더 정교한 AI 시스템을 만드는 데 기반이 됩니다. 다음은 이 기본 flow를 확장할 수 있는 몇 가지 방법입니다:
사용자 상호작용 향상
섹션 제목: “사용자 상호작용 향상”더욱 인터랙티브한 플로우를 만들 수 있습니다:
- 입력 및 출력을 위한 웹 인터페이스
- 실시간 진행 상황 업데이트
- 인터랙티브한 피드백 및 개선 루프
- 다단계 사용자 상호작용
추가 처리 단계 추가하기
섹션 제목: “추가 처리 단계 추가하기”다음과 같은 추가 단계로 flow를 확장할 수 있습니다:
- 개요 작성 전 사전 리서치
- 일러스트를 위한 이미지 생성
- 기술 가이드용 코드 스니펫 생성
- 최종 품질 보증 및 사실 확인
더 복잡한 Flows 생성하기
섹션 제목: “더 복잡한 Flows 생성하기”더 정교한 flow 패턴을 구현할 수 있습니다:
- 사용자 선호도나 콘텐츠 유형에 따른 조건 분기
- 독립적인 섹션의 병렬 처리
- 피드백과 함께하는 반복적 개선 루프
- 외부 API 및 서비스와의 통합
다양한 도메인에 적용하기
섹션 제목: “다양한 도메인에 적용하기”동일한 패턴을 사용하여 다음과 같은 flow를 만들 수 있습니다:
- 대화형 스토리텔링: 사용자 입력을 바탕으로 개인화된 이야기를 생성
- 비즈니스 인텔리전스: 데이터를 처리하고, 인사이트를 도출하며, 리포트를 생성
- 제품 개발: 아이디어 구상, 디자인, 기획을 지원
- 교육 시스템: 개인화된 학습 경험을 제공
주요 특징 시연
섹션 제목: “주요 특징 시연”이 guide creator flow에서는 CrewAI의 여러 강력한 기능을 시연합니다:
- 사용자 상호작용: flow는 사용자로부터 직접 입력을 수집합니다
- 직접적인 LLM 호출: 효율적이고 단일 목적의 AI 상호작용을 위해 LLM 클래스를 사용합니다
- Pydantic을 통한 구조화된 데이터: 타입 안정성을 보장하기 위해 Pydantic 모델을 사용합니다
- 컨텍스트를 활용한 순차 처리: 섹션을 순서대로 작성하면서 이전 섹션을 컨텍스트로 제공합니다
- 멀티 에이전트 crew: 콘텐츠 생성을 위해 특화된 에이전트(writer 및 reviewer)를 활용합니다
- 상태 관리: 프로세스의 다양한 단계에 걸쳐 상태를 유지합니다
- 이벤트 기반 아키텍처: 이벤트에 응답하기 위해
@listen데코레이터를 사용합니다
플로우 구조 이해하기
섹션 제목: “플로우 구조 이해하기”플로우의 주요 구성 요소를 분해하여 자신만의 플로우를 만드는 방법을 이해할 수 있도록 도와드리겠습니다:
1. 직접 LLM 호출
섹션 제목: “1. 직접 LLM 호출”Flow를 사용하면 간단하고 구조화된 응답이 필요할 때 언어 모델에 직접 호출할 수 있습니다:
llm = LLM( model="model-id-here", # gpt-4o, gemini-2.0-flash, anthropic/claude... response_format=GuideOutline)response = llm.call(messages=messages)특정하고 구조화된 출력이 필요할 때 crew를 사용하는 것보다 더 효율적입니다.
2. 이벤트 기반 아키텍처
섹션 제목: “2. 이벤트 기반 아키텍처”Flows는 데코레이터를 사용하여 컴포넌트 간의 관계를 설정합니다:
@start()def get_user_input(self):    # First step in the flow    # ...
@listen(get_user_input)def create_guide_outline(self, state):    # This runs when get_user_input completes    # ...
이렇게 하면 애플리케이션에 명확하고 선언적인 구조가 만들어집니다.
3. 상태 관리
섹션 제목: “3. 상태 관리”flow는 단계 간 상태를 유지하여 데이터를 쉽게 공유할 수 있습니다:
class GuideCreatorState(BaseModel): topic: str = "" audience_level: str = "" guide_outline: GuideOutline = None sections_content: Dict[str, str] = {}이 방식은 flow 전반에 걸쳐 데이터를 추적하고 변환하는 타입 안전(type-safe)한 방법을 제공합니다.
4. Crew 통합
섹션 제목: “4. Crew 통합”Flow는 복잡한 협업 작업을 위해 crew와 원활하게 통합될 수 있습니다:
result = kickoff_content_crew(inputs={ "section_title": section.title, # ...})이를 통해 애플리케이션의 각 부분에 적합한 도구를 사용할 수 있습니다. 단순한 작업에는 직접적인 LLM 호출을, 복잡한 협업에는 crew를 사용할 수 있습니다.
다음 단계
섹션 제목: “다음 단계”이제 첫 번째 flow를 구축했으니 다음을 시도해 볼 수 있습니다:
- 더 복잡한 flow 구조와 패턴을 실험해 보세요.
@router()를 사용하여 flow에서 조건부 분기를 만들어 보세요.- 더 복잡한 병렬 실행을 위해
and_및or_함수를 탐색해 보세요. - flow를 외부 API, 데이터베이스 또는 사용자 인터페이스에 연결해 보세요.
- 여러 전문화된 crew를 하나의 flow에서 결합해 보세요.
- 대화형 Flow로 멀티턴 채팅 앱 구축 (
kickoffper message,ChatSession, 지연 트레이싱)